How to: Setup Departments and/or Categories within mPower
With laws changing all the time, you may get to add a new department. These changes can include you being allowed to sell convenience items, cigarettes, or maybe even a new category of beer.
This is a walk-through on how to create new departments and categories within mPower.
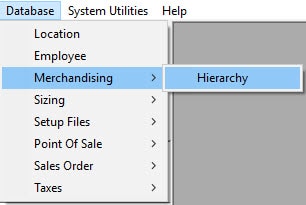
STEP 1:
To begin, go to Database >> Merchandising >> Hierarchy.
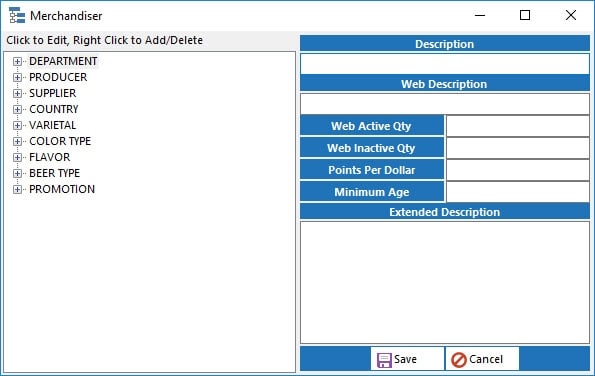
It will then bring up the Merchandiser screen. On the left-hand side you can see your current hierarchy’s.
For the purpose of this how to, you will be utilizing the Department node.
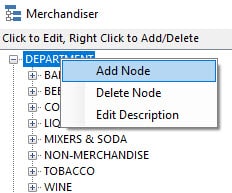
STEP 2:
To create a new department, simply right click on Department and select Add Node.
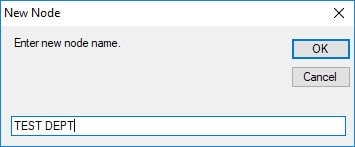
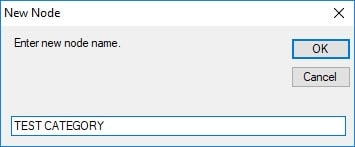
STEP 3:
You will then enter in the new Department name.
STEP 4:
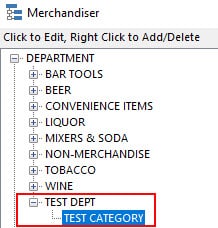
Next, the new Department name is automatically added under the Department heading. Right-click on the new Department and click Add Node.
Add the name of the new category within that department.
You will see both the new department and category.
Conclusion
Now, when you go into an Item’s information, you can choose your new Department and Category.

This was a quick how-to to add departments and categories. As a reminder, do not add duplicate departments/categories as it can disrupt your data and reporting.